SLUDGE CRAFT is a joyful trash-to-treasure workflow which converts waste clay slip ("slop") and waste waterjet abrasive ("sludge") into a unique ceramic composite that is strong, abrasive, expressive, and laser-glaze-able. Janet Hollingsworth and Zach Fredin first studied this fascinating material at Haystack Mountain School of Crafts in Deer Isle, ME, as part of Haystack Labs 2025. Thank you to all the participants that contributed ideas, materials, and sculptures to the project!
Make it!
Do you have access to basic pottery equipment? Did your friend just get a waterjet cutter, and now has a tank full of waste abrasive they need to excavate? Are you excited about new artistic mediums that are also interesting engineering materials? Sounds like it is time for SLUDGE CRAFT!
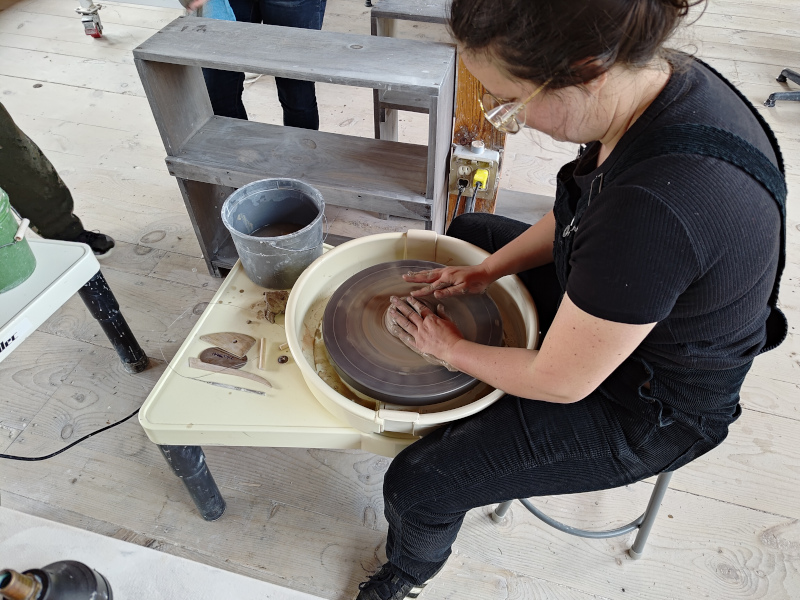
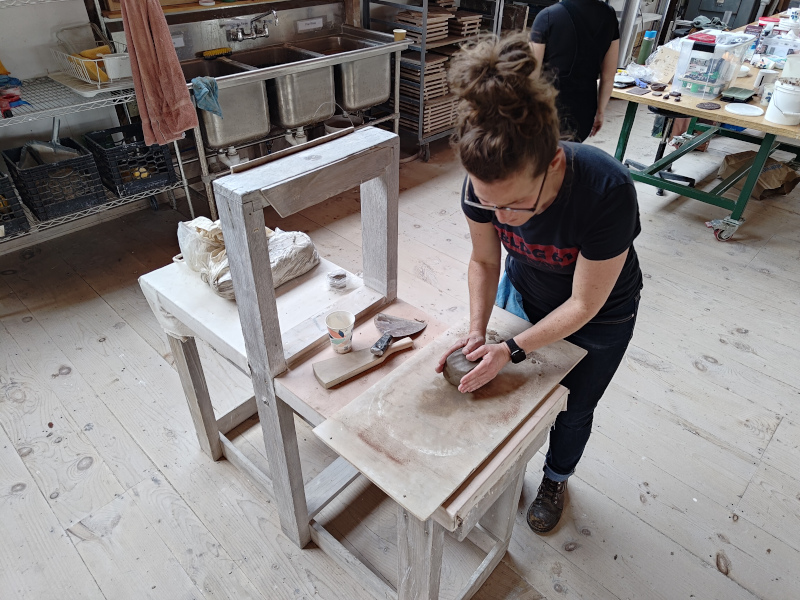
above, Mia throws sludge to make a pot at Labs 2025.
A note on safety! Waterjet sludge is generally inert unless the machine has been used to cut toxic materials like copper-beryllium or lead. Ask your waterjet operator and steer clear if they have to treat their sludge as toxic waste. Beyond that, dry waterjet sludge is a dusty silicate, so wear a mask when handling the dry powder and clean up with a wet towel when you're done with a sludge fabrication session. The little treasures you find in the sludge, which are offcuts from machine operation, can occasionally be sharp, particularly if folks are using the waterjet to process glass. Wear normal workplace PPE when necessary, like close-toed shoes and safety glasses, and be careful around the hot kiln. Sludge is safe for pottery equipment (i.e., it won't damage kilns), but be careful not to mix it in with clay that folks may want to use for non sludge experiments.
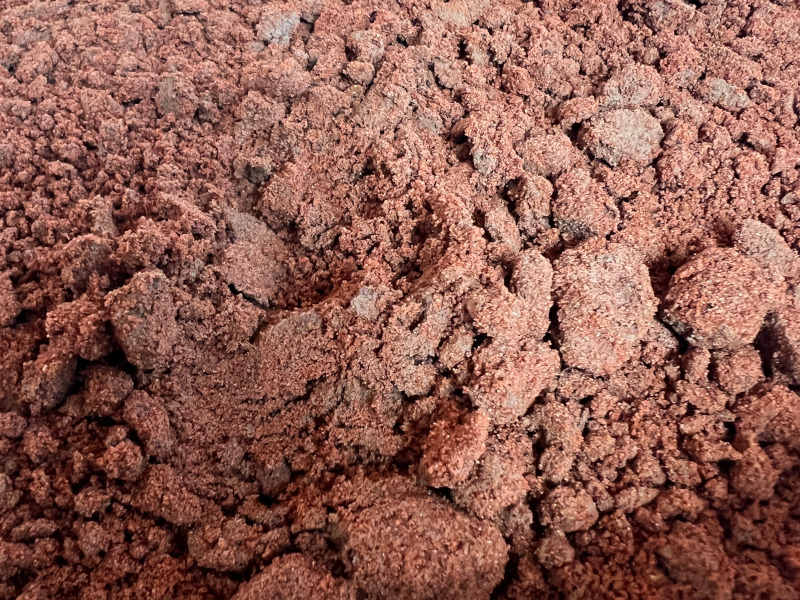
above, fresh damp waterjet sludge from the CBA'sOMAX 5555.
Find your work area. You will want a few tables you can get messy with clay debris, and ideally, a spot in the sun to dry raw sludge and finished SLUDGE CRAFT items. A typical pottery workspace is perfect; just be sensitive about mixing sludge with non-sludge, and avoid sending the material through extruders or rollers without permission. Be a good studio steward: ask before moving someone else's project, and clean up when you're done.
Prepare some sludge. Ask your waterjet-owning-friend to let you scoop a few buckets out of their tank, then spread it out in the sun to dry (or, lacking sun, use a drying cabinet or a non-food-oven or a spare table for a week in a dry room). Remember treasures can be sharp, so be careful with this step.
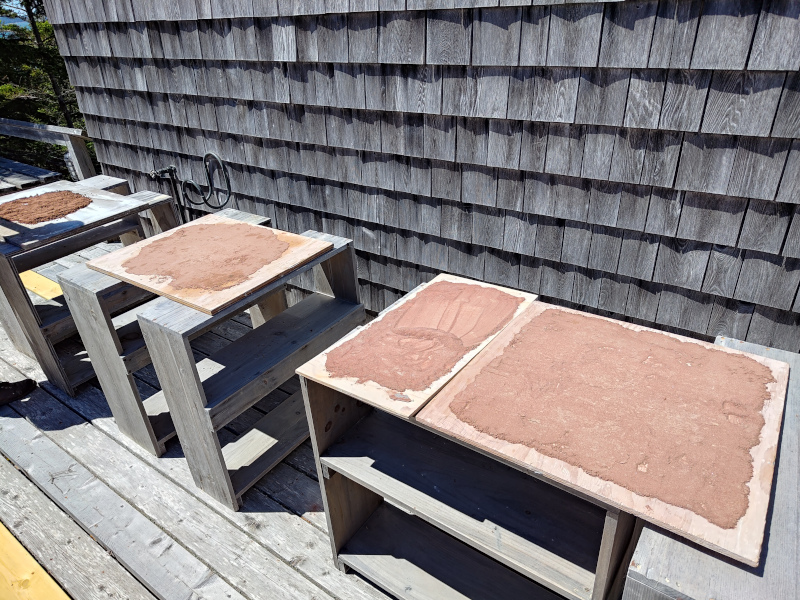
above, we had perfect sludge drying weather at Labs 2025, so we dried sludge on the deck next to the ceramics studio.
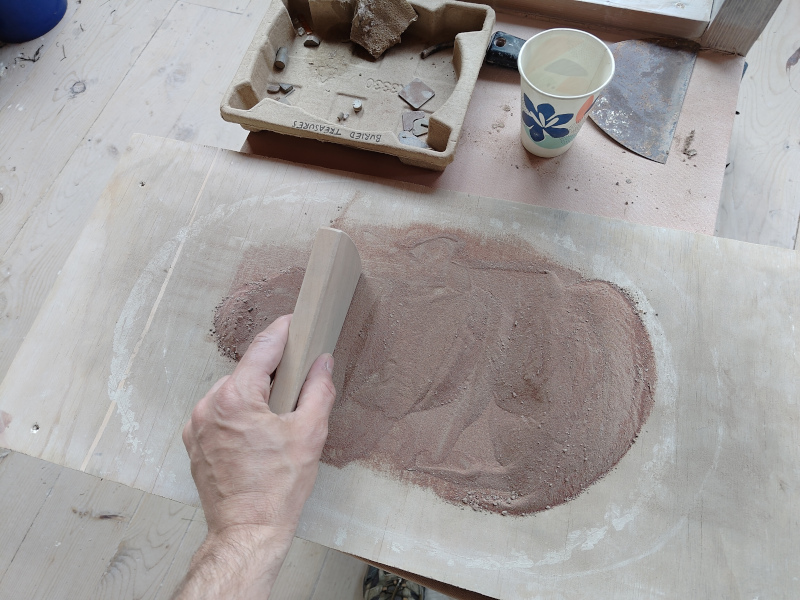
Once the sludge is bone-dry and powdery (remember the mask!), use a block of wood to pulverize it. This helps with mixing later, and also gives you a chance to screen out treasures.
above, crushing and sifting treasures out of sludge.
above, the treasures we found at Labs 2025 during sludge-screening.
Mix the sludge with waste slip at roughly 1:1 by mass. Proportions aren't precise, since waste slip contains a variable amount of liquid, but we found 1:1 by mass gave us a good workable material without needing to add extra water. More sludge yielded crumbly material that didn't fire well, and less sludge used up less sludge, and we want to maximize sludge use! Start with 500g of each ingredient, which comes out to roughly the volume of a small Dixie cup. Plop the waste slip onto the screened dry sludge and start folding it together. Mixing starts out as a mess monster, akin to sticky pizza dough, but keep at it...
above, Janet starts mixing a batch of sludge with waste slip. This is a messy process.
... and eventually, you can treat the material like regular clay! At this point, wedge it on a table as you would normally before using it to build clay things. Add water as needed to avoid cracking and to stick things together and to generally make it friendly to work with.
above, Janet wedges some sludge after thoroughly mixing it with waste slip.
Once you've built your clay things, set them aside to dry for a bit. We again used the sun to dry our SLUDGE CRAFT sculptures, but you can also use a drying cabinet. Or just set the kiln to pre-fire for a few hours; we ended up with a few squishy items and a 4-hr pre-fire at 200 F took care of them without cracking.
above, drying a round of SLUDGE CRAFT sculptures in the sun.
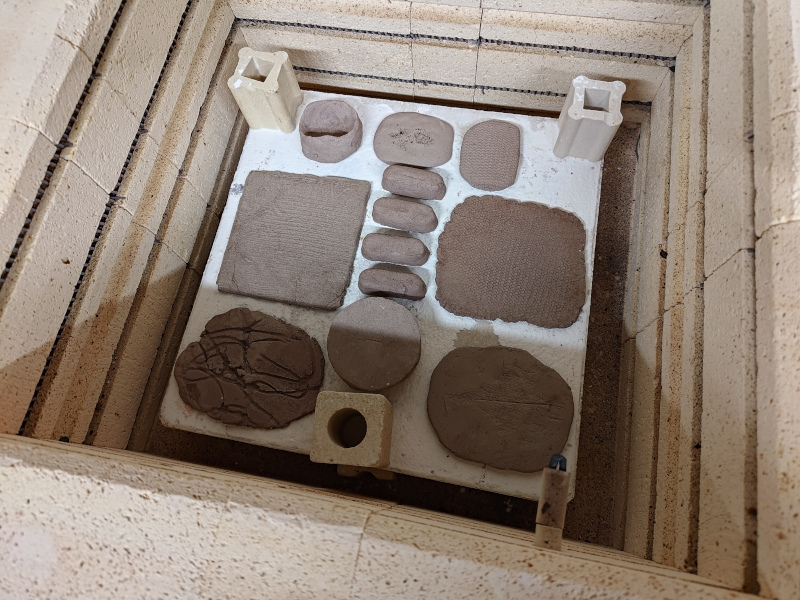
Firing time! If you have a test kiln, try a small run first to make sure you like the results. We fired our first run at Cone 7 (~2230 F), which is pretty far into the high fire range; at some point it would be neat to try bisque firing and glazing, but kiln cycles are limited in a 1-week charrette. We chose this temperature because it was low enough to avoid seriously over-firing any of the waste clays mixed into our slip. For our test run, we pre-fired at 200 F for 2 hours and then ramped at 500 F/hr to Cone 7, then shut the kiln off and started pulling samples out at ~300 F (which is why they were still a bit warm at the morning meeting). We later filled the mid-sized Bailey and fired it overnight; since some of those pieces were wetter, we pre-fired at 200 F for 4 hours and ramped a bit slower, at 350 F/hr. We suggest starting in this range and exploring from there. Let us know what settings you use, and how they work!
above, one layer of our test firing loaded into the test kiln.
If you do make and share your SLUDGE CRAFT creations, we kindly ask that you link to this documentation, and also back to the Haystack Labs site.
Why are we doing this?
Fab Labs, makerspaces, and community creation clubs are deeply important to us, but as facilitators and technicians we are keenly aware of the ongoing battle against waste. Laser cutters produce a constant stream of fussy offcuts; chop saws yield increasingly unusable stubs of dimensional lumber; 3D printers leave a trail of support material and test parts; the list goes on, and in our experience, is often invisible to community members. As we build out the new fabrication center at The Metro in Kingston, NY, we are keen to push the waste needle towards awareness and reuse.
SLUDGE CRAFT serves two purposes. The project itself, a joyful sprint through experimentation and craft during a brief visit to the Maine coast, tells a compelling story about reusing the waste produced by one of the key machines we are putting in the new space. But more broadly, the process we demonstrated at Haystack -- participatory experimentation, joyful tangents, active community participation, and a deep connection to craft and artistry -- will serve as a model for all the material reuse workshops we will hold in the future as we aim to render our trash cans obsolete.
Labs 2025...
above, our temporary SLUDGE CRAFT lab in the Haystack ceramics studio.
SLUDGE CRAFT started as a much broader exploration to pair waterjet waste with a wide range of binders! Perhaps we shall write more about this in the future; for now, a few delightful pictures from a fabulous week:
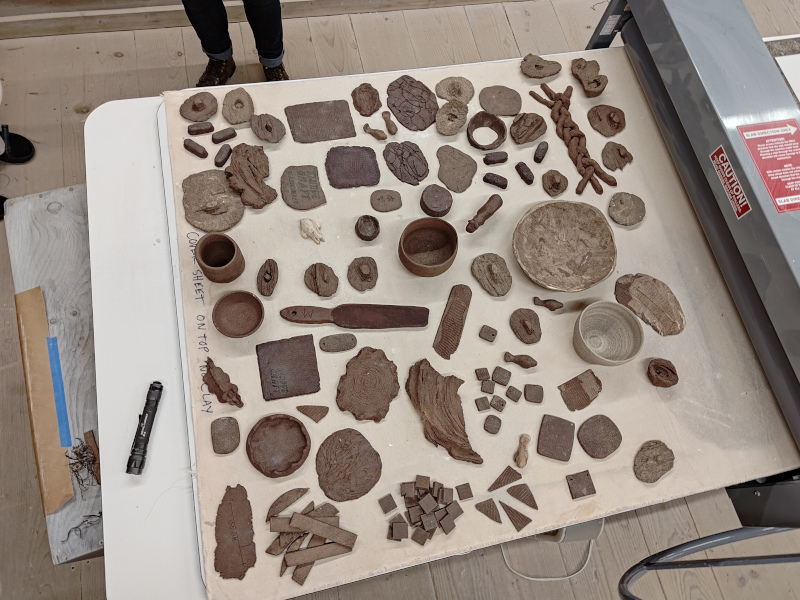
above, all 115 items made by Labs 2025 participants, shortly after firing and unloading the kiln. Thank you all for your lovely contributions!
above, imprinting material with cloth from Craftwork.
above, SLUDGE CRAFT makes a nice abrasive stone; Josh made a tool for adding crenelations to Haystack forks, so they can be quickly identified from the meal line.
above, Barb helped us with some sludge-cyanotype experiments; here, we used cyanotype solution instead of water with sludge-plaster. The deep indigo color is incredible, and some of the sun imprints appeared and faded over time, making the material feel alive.
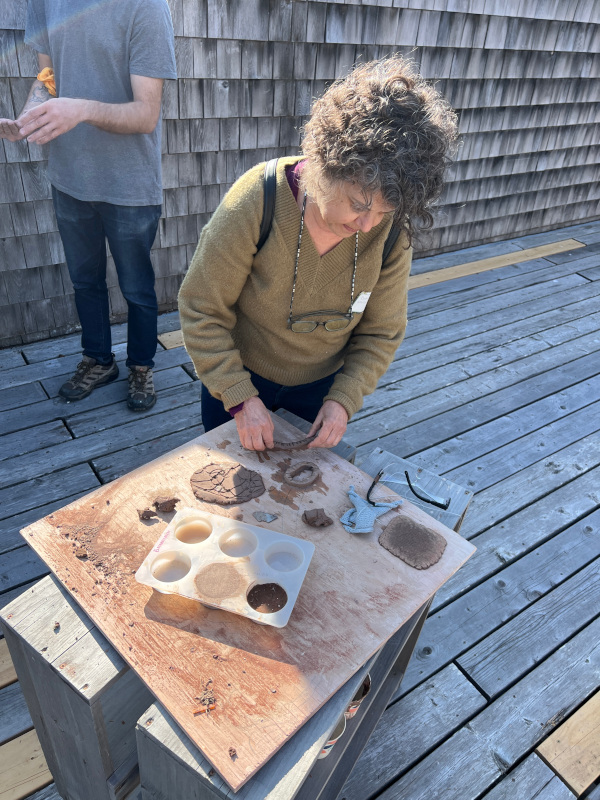
above, Debra imprints some SLUDGE CRAFT slabs with a variety of found materials.
above, Alex made some fabric dye resist: 117 mL water, 1 g guar gum, 21.5 g rice flour, 1.5 g lime, and 350 g sludge, plus a sprinkle of lucky sawdust!
above, various SLUDGE CRAFT test ducks made from sludge-cement and sludge-silk-glue.
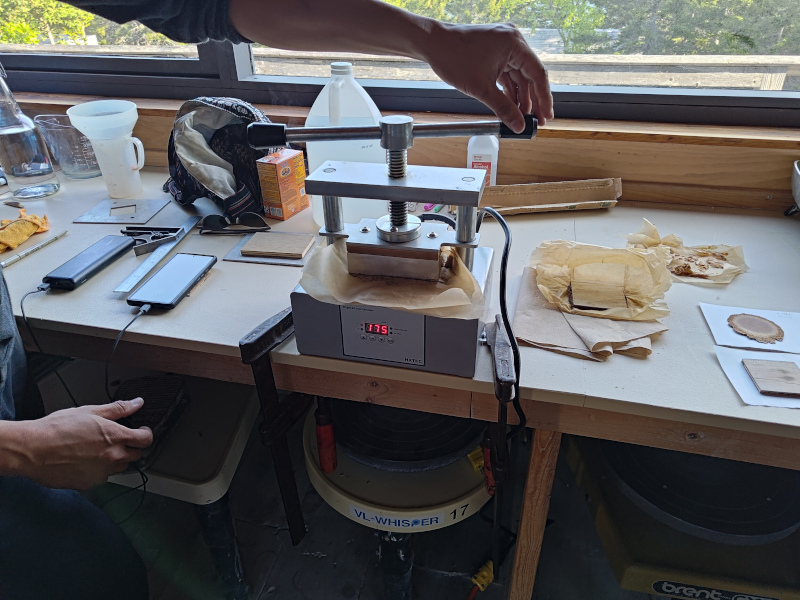
above, Arthur helped us heat-press some sludge-silk-glue composite panels. They got a bit brittle but had an interesting texture (and smell).
above, a critical flame test! Mia and Kate (off-camera) helped Zach melt down a bit of dry sludge in the hot shop using an oxy-propane torch. This helped assure us that nothing sketchy (like unexpected outgassing) would happen at high temperatures, and opened the door to sintering SLUDGE CRAFT in the Haystack kilns.
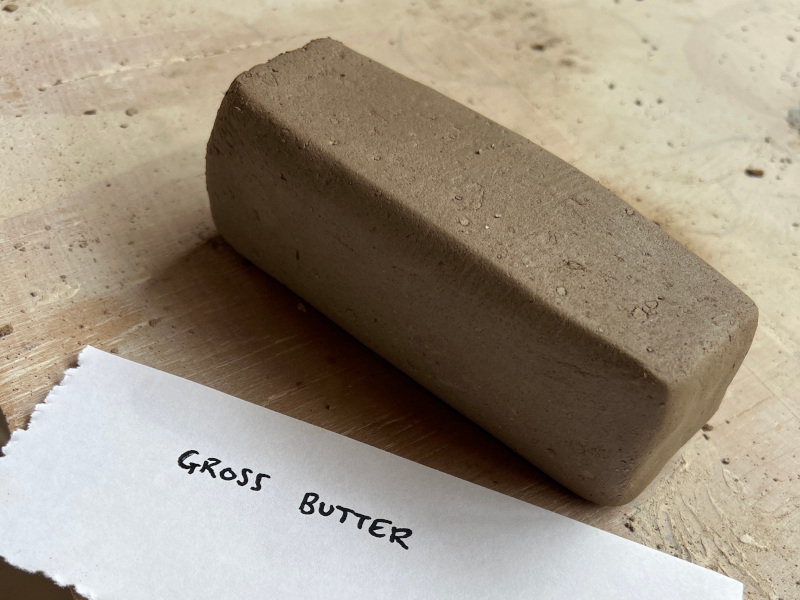
above, once we had the process dialed in we started passing out chunks of "gross butter" to other participants before our big Bailey kiln run. The majority of Labs 2025 attendees ended up making something out of the material.
above, Rebecca made some adorable SLUDGE CRAFT manatees. Manatees are so important! Be nice to every manatee you meet.
above, we tested many binder materials! Shown here: plaster, cement, epoxy, clay slip, silk glue.
above, Marissa threw a fabulous SLUDGE CRAFT pot. The potters (Seth, Mia, and Marissa) all cut the sludge with a bit more slip to avoid over-exfoliation ("it's like throwing sandpaper").
above, Tiri's amazing Moo Deng tribute.
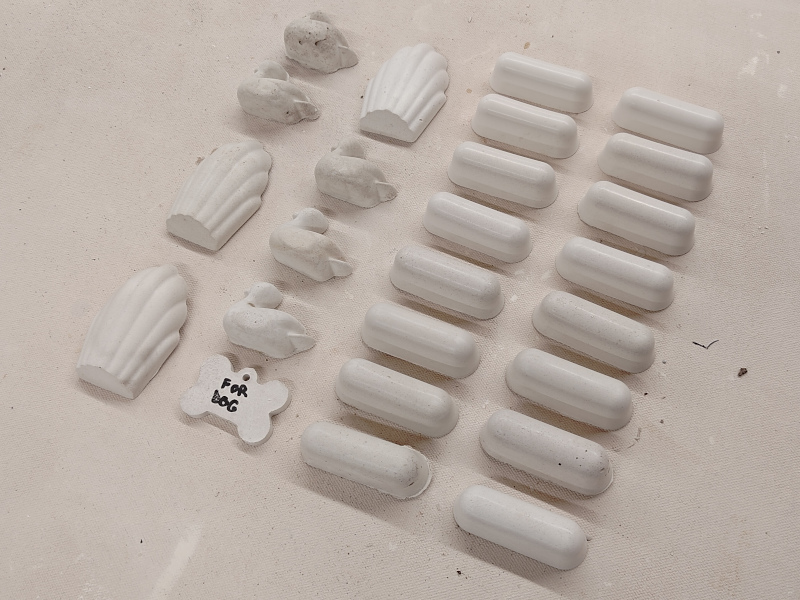
above, plaster was a fun binder to test; even at high sludge loading it still came out quite light-colored. We also tried harder compounds like Hydrocal which produced similar results.
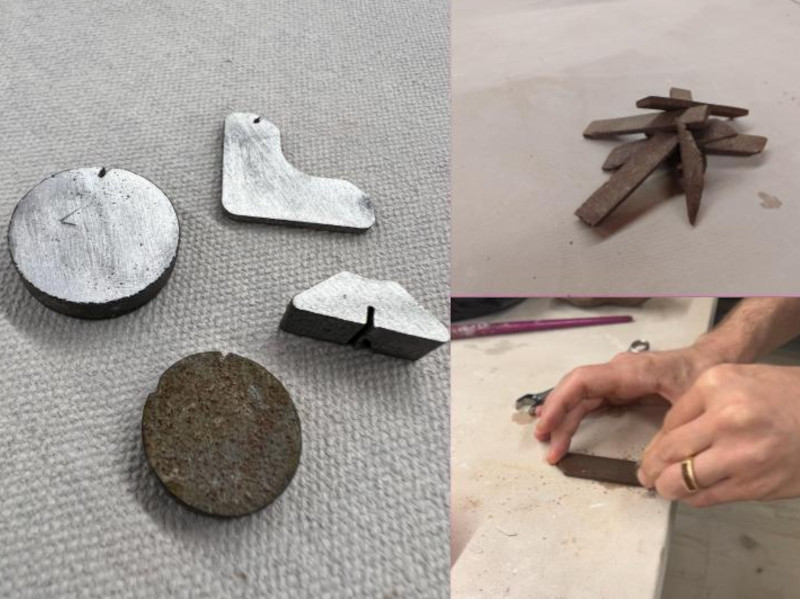
above, flat SLUDGE CRAFT tiles make reasonable wet polishing stones! Here, we cleaned up and shined the faces of a few aluminum waterjet treasures.
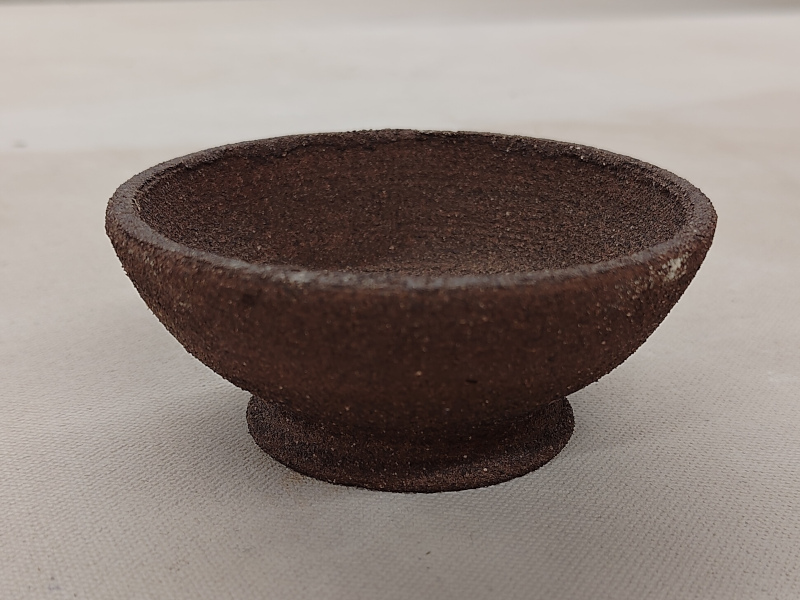
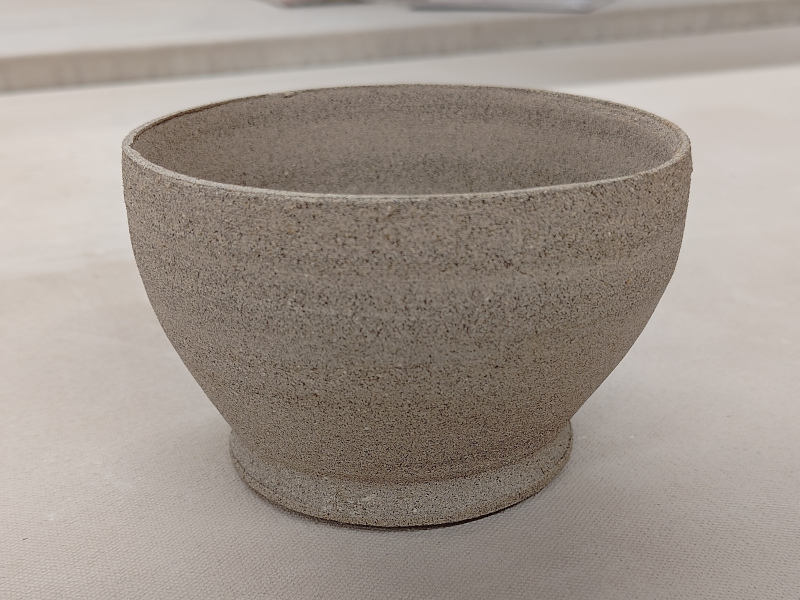
above, Seth threw a beautiful bowl using a mix of sludge and fresh clay from his personal stash, at a slightly lower ratio (perhaps 30:70 by mass).
above, Rebecca made a lovely ramen bowl decorated with imprinted patterns from her company Rurban.
above, work briefly pauses to rescue a ruby-throated hummingbird from the fab lab. She just needed a moment and flew off shortly after this clip was recorded.
above, a few SLUDGE CRAFT bits made with silk glue as a binder, in collaboration with the Silklab folks.
above, the first fired SLUDGE CRAFT plate we made in the test kiln; after the morning meeting, Neil threw it up in the air as far as he could, and when it didn't break, he propped it up on a stone and stood on it with all his weight, at which point it finally fractured. Thank you Neil for your contributions to science!
above, sludge-epoxy composite was still sticky before it cured completely, as we discovered here.
above, Victoria from Craftwork applies plaster-sludge to one of her woven speakers to stiffen it up and increase the volume.
above, testing the sludge speaker with an array of aligned neodymium magnets. It did get louder as compared to the cloth-only version; right-click and unmute!!
above, the sludge speaker playing a tune at the morning meeting.
above, Alex's wonderful sludge soap with accompanying ad copy and spiked SLUDGE CRAFT soap dish. Highly exfoliating!!
above, Laura's woodpecker tree casts, from a great tree filled with woodpecker holes.
above, filling the big Bailey kiln with all of the lovely artifacts made by Labs participants.
above, an important part of science -- Writing It Down -- meets the friendliness and accessibility of zines. These were some of our lab notebooks for the week; we encouraged participants and fellow experimenters to fold their own for good record-keeping. Zines!!!
... and beyond
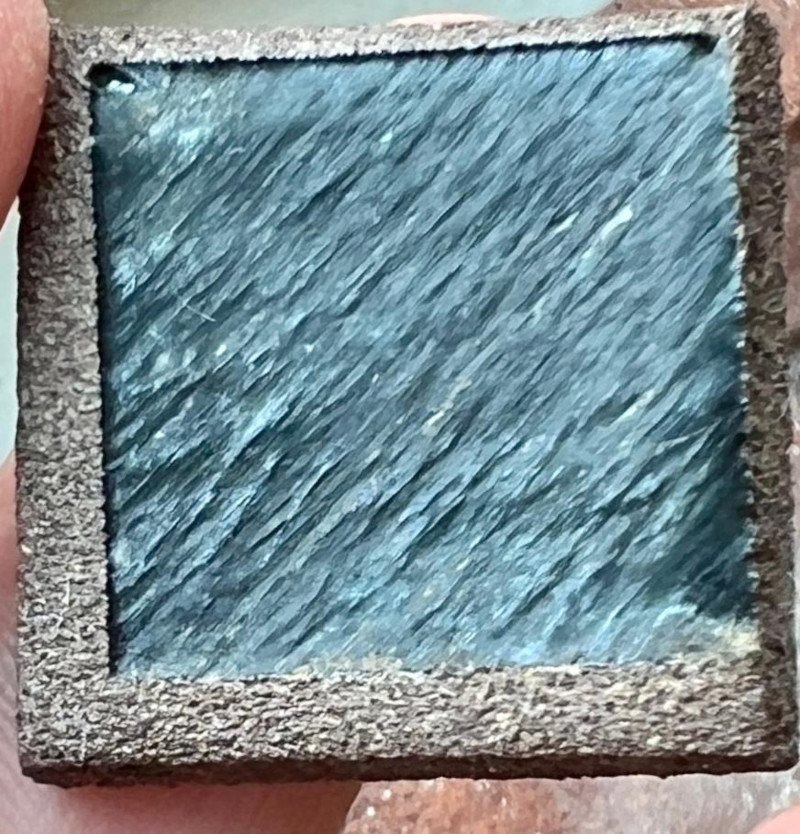
The experiments didn't stop after Labs 2025! Ah yes, we all have the SLUDGE CRAFT bug now. On the last day, Janet tried laser engraving a tile and ended up with the SLUDGE CRAFT logo shown at the top this page. We both hoped this would happen; during the flame test, the garnet melted down into a black obsidian-like lump, and we figured there was a chance the laser would vitrify the exposed garnet and produce an interesting result. Turns out it works INCREDIBLY WELL; we sometimes call it "self glazing tile" or "laser glazing", since you can just hit the material with a laser after firing. After returning to our respective homes, we continued to experiment on some of the extra SLUDGE CRAFT tiles we brought back.
above, a laser glazed image of a creature from Rebecca's fabulous collection at Rurban.
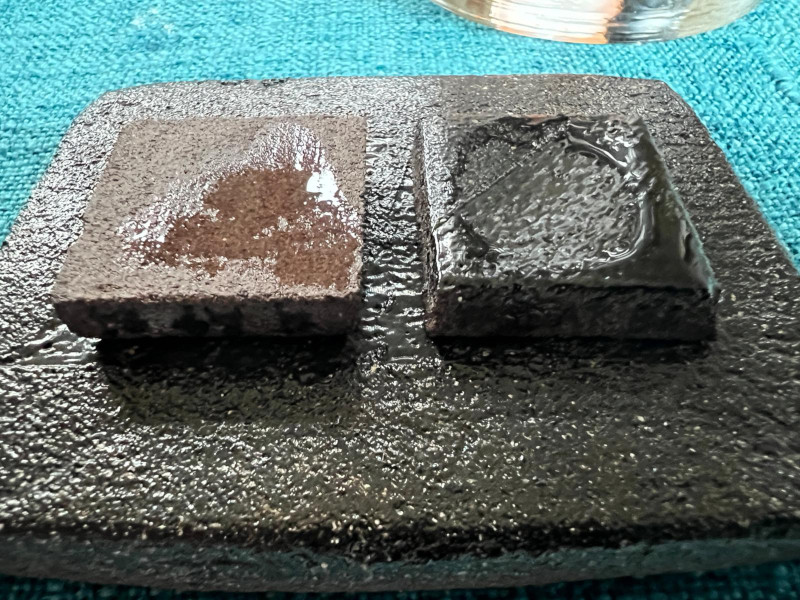
above, the fired tile is a bit porous and can soak up water, but the vitrified area treated by the laser causes water to bead up.
above, feed and speed tests for laser glazing on an extra tile. We liked the finish on the bottom center square; on an xTool P2S 55 W C02 laser, this was power 100, speed 100, one pass, 300 lines/cm. Note the colors! Much yet to explore.
above, a close-up of a laser glazed tile, showing the dramatic "sinking" that occurs during the process and the direction of the laser raster scan lines.
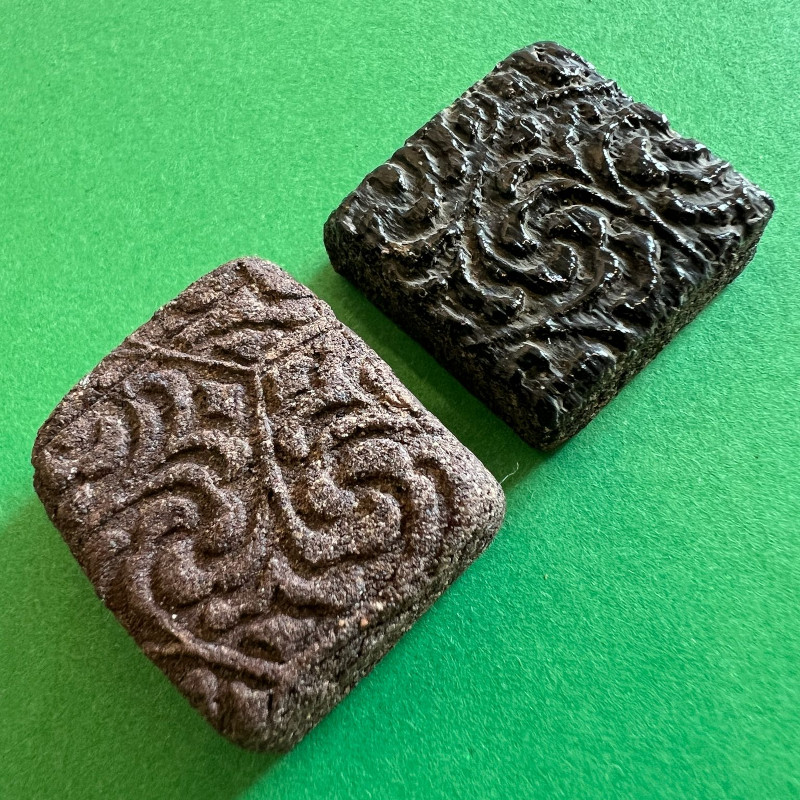
above, a laser glazed textured tile (texture from Rurban artists) next to an untreated tile.
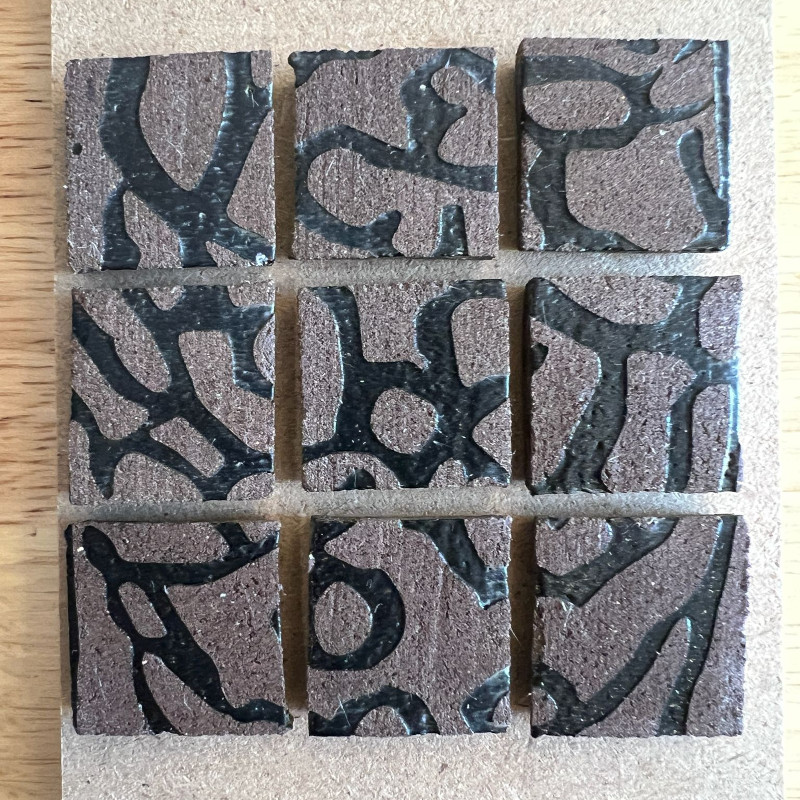
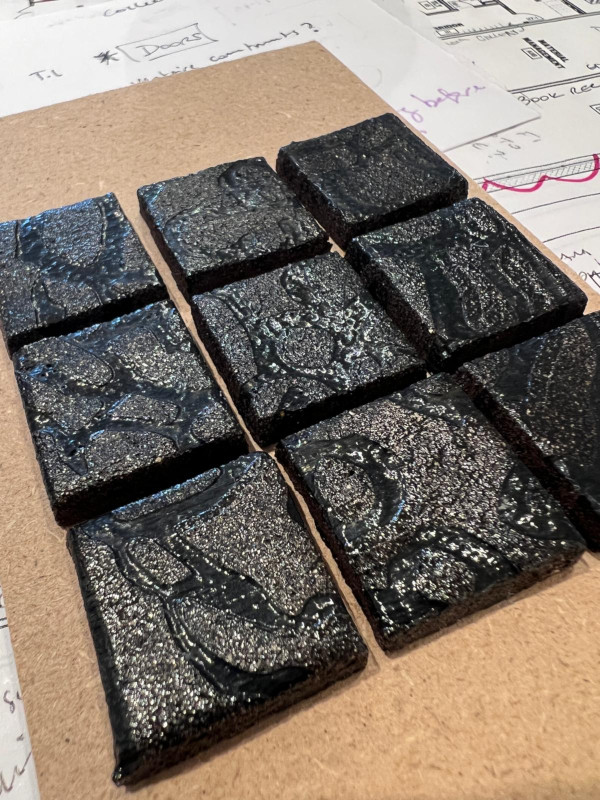
above, nine tiles with Virpi's (our favorite monk seal) markings, arranged in a grid, waiting for sludge grout. Thanks to Barb for introducing us to Virpi!
above, testing overlapping laser settings with increasing power, showing the range of expressive textures possible with this method.
Andy Hollingsworth kindly offered to SEM a few of our tiles as well so we could look at, well, everything: fracture surfaces, dried sludge, and vitrified tiles. Thank you Andy!
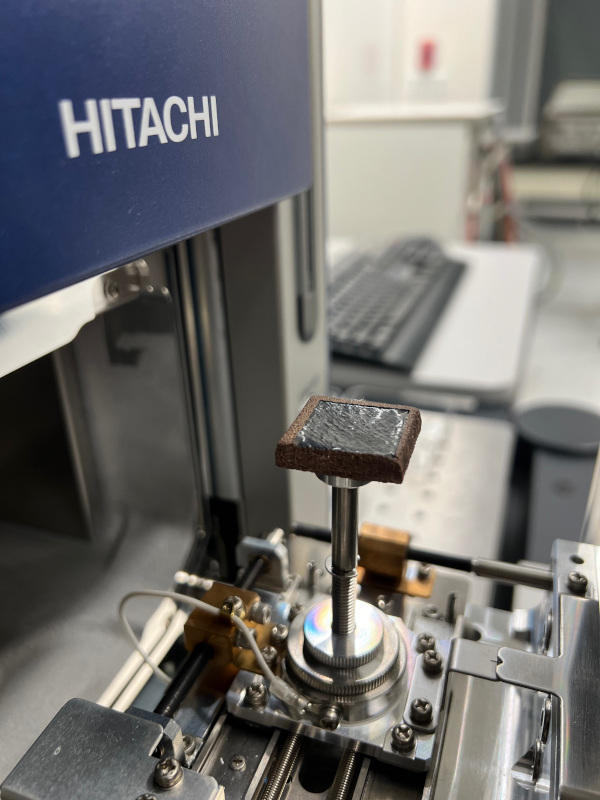
above, the laser-treated tile enters the SEM. Andy noticed that the tiles didn't seem to charge too easily, so no conductive coating was needed for imaging.
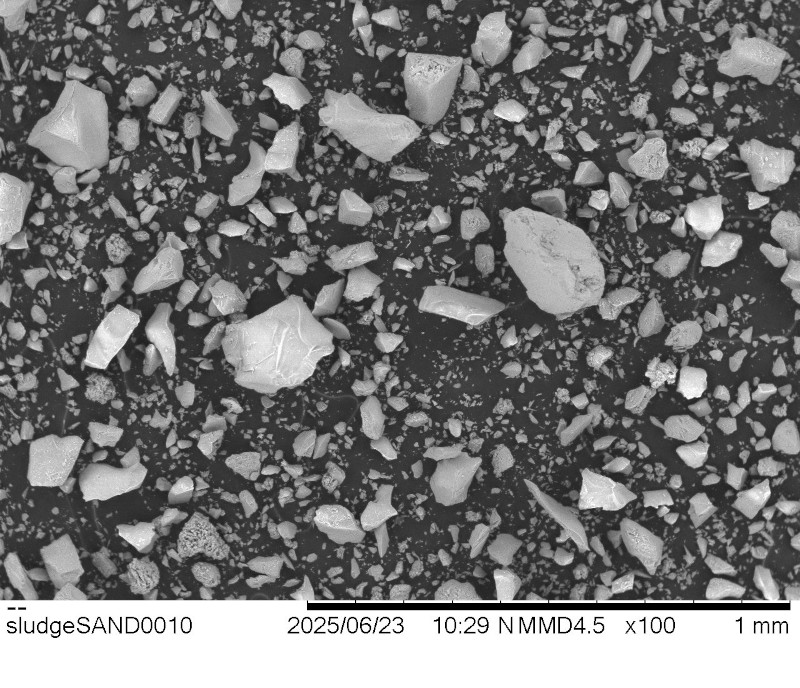
above, a macro-micrograph of dry sludge powder. Note the wide size distribution of the garnet particles, characteristic of the fracturing action that occurs during the machining process.
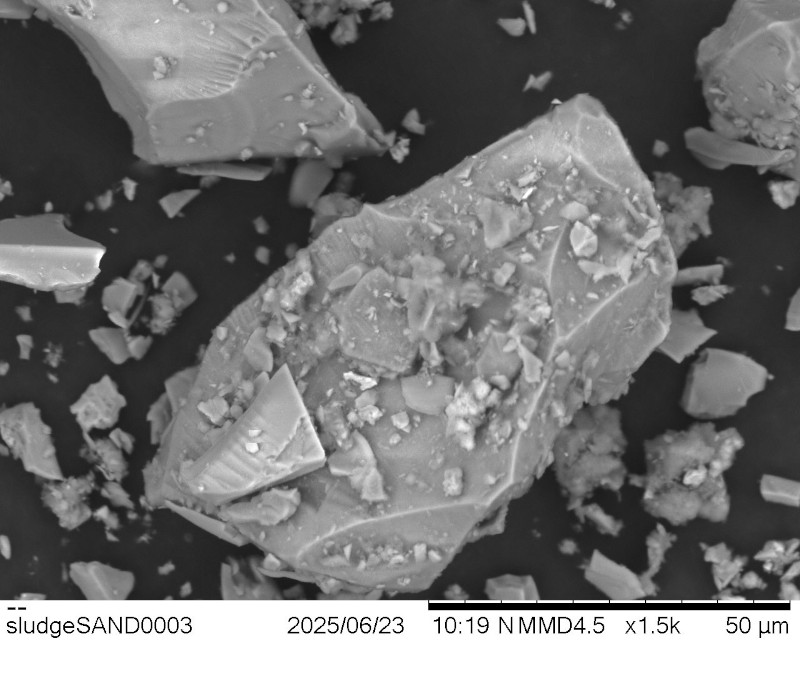
above, a closer-in micrograph of dry sludge powder.
above, an even-closer-in micrograph of dry sludge powder. Again, notice the wide size distribution of particles; single-digit to hundreds of microns.
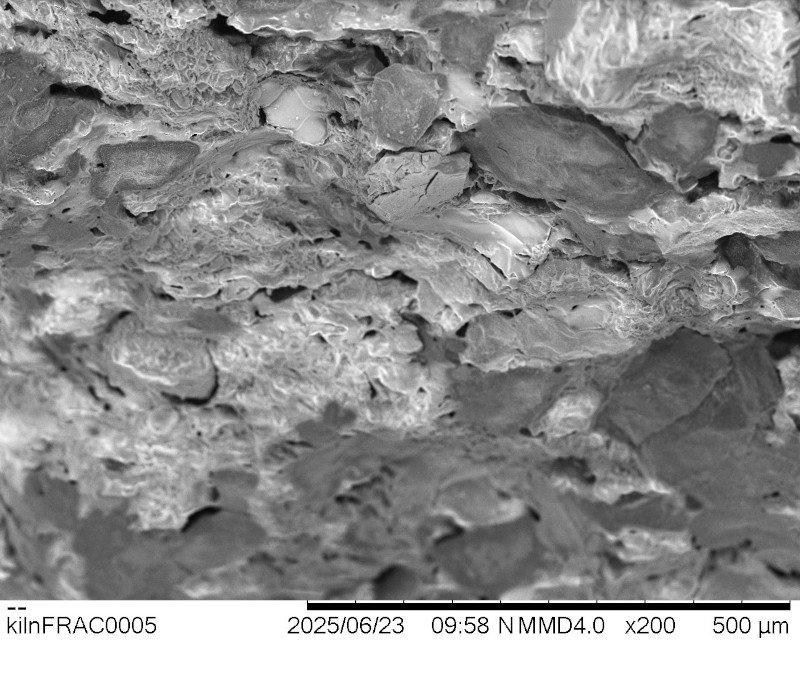
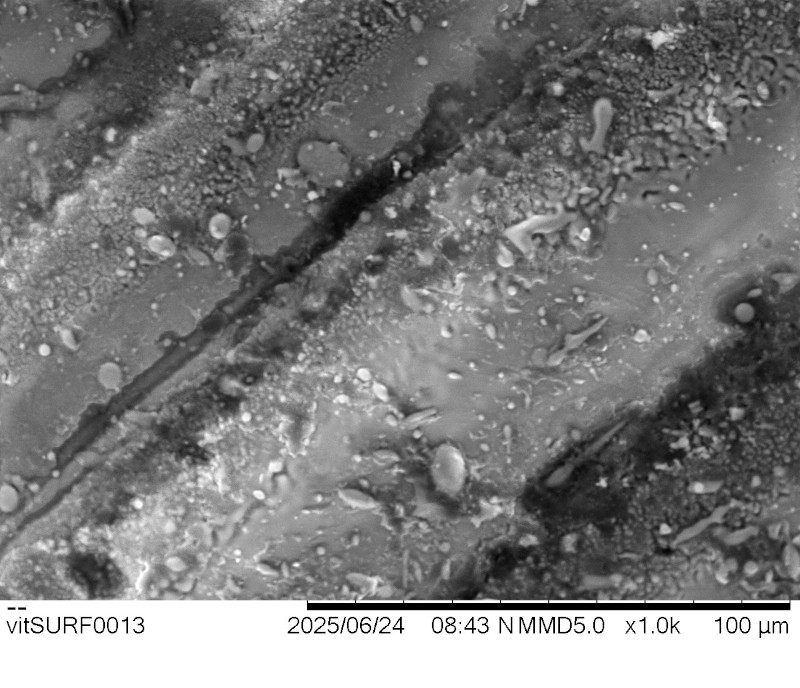
above, a micrograph of a recently broken tile, showing the detailed fracture surface. Note embedded garnet particles nestled in the clay matrix, along with some apparent porosity (which is consistent with the tiles soaking up a bit of water).
above, a macro-micrograph of a laser-treated tile, with the vitrified area below the untouched tile. Note laser raster lines.
above, a micrograph of a laser-treated tile, showing the vitrified area and several laser raster lines. Note particles and weird swirly areas.
We also tried thermally treating tiles with an oxy-mapp torch. This produced the same vitrified surface as the laser treatment, albeit with far less precise control over the extent and depth of the glazing effect.
above, flame-glazing a tile with an oxy-mapp torch
above, a flame-glazed tile after hot-imprinting with a metal punch. This tile subsequently broke after tapping on it with the punch after cool; we suspect repeated thermal cycling (it was torched twice) produced cracks that weakened the material. This tile also got heated red-hot and dropped in a cup of cold water, so that may have contributed to the failure as well. Next time we will make more tiles.
What comes next?
Well, first, we'd love for you to try SLUDGE CRAFT. See the "Make it!" section, above, and show us what you create so we can link to your experiments! And second, we'd like to keep following the experimental rabbit holes. Of the many we've uncovered, a few stand out as potential next steps:
mechanical tests: proper instrumented 3-point bend tests of standardized samples. We know SLUDGE CRAFT material is incredibly strong (like, shockingly strong. One advisor-weight strong. You'll see, go do some SLUDGE CRAFT). Where does it fit on the Ashby plot? It would also be interesting to study how well the vitrified layer sticks to the bulk material; the ceramic tile industry probably has some good durability tests we could do, perhaps by dropping a calibrated ball bearing onto the surface from a known height or similar.
analytical work:SEM-EDS to see where the metal kerf powder (mostly aluminum and steel in our case) ends up; does it migrate to the surface, integrate with the matrix, cluster around garnet, form little globs, etc? And probably more imaging to better understand the garnet:clay matrix interface; etc.
parameter sweeps: sludge-to-clay mix ratios; slip types (earthenware, stoneware, etc); firing parameters (max temp and ramp rate, "heatwork"); drying time; water content; size distribution of sludge fines; etc.
comparisons: vs unused waterjet media; vs sand-and-clay; vs just clay; vs commercial tiles; vs frozen marshmallows; vs densified preforms (via pressing, etc); etc.
And we also want to write about this more, and run more workshops, and collaborate on cool SLUDGE CRAFT projects. So if you think this is interesting, and have SLUDGE CRAFT ideas, get in touch!
janet dot s dot hollingsworth, zachary dot fredin, both at gmail dot com